
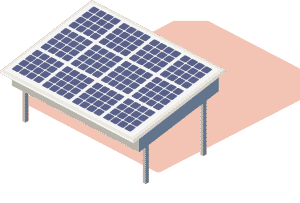
Set up solar panels
What is a Solar Panel?
The primary sunlight is the primary source for solar power. PV panels, commonly known as solar, serve to convert solar energy from in the skies into electric power. They convert energy particles known as photon into electricity capable of increasing voltage sources.
Solar panels are a great option for many purposes such as remote power systems for cabins as well as remote sensing. Also, you can produce electricity using residential or commercial system of solar power.
This page will discuss the technology and benefits that solar panels offer. Find out how solar panels function and where they can be purchased.
Solar Panel Setup has been around for over 100 years. Solar Panel Setup was originally used to generate steam, which could then be utilized to power machinery. Sunlight was not able to be converted into electric power until Edmond Becquerel established the “photovoltaic effects.”
Charles Fritts, who discovered the photovoltaic phenomenon in 1893, invented the first solar cell. It was constructed by encapsulating selenium sheets in gold thin layers. This humble start would come the device that we now are able to recognize as solar arrays.
Russel Ohl is an American inventor working for Bell Laboratories. He patented his first solar panel made of silicon. The same company manufactured its first solar panels in the year 1954 due to Ohl’s invention. The first use for solar panels was for space satellites. The 1970s were the era where the first exposure of most people to solar panels was through their calculator.
Solar panels and whole solar panels can be used today to power numerous applications. Yes, calculators use solar panels made of solar cells. They provide solar power to whole homes and commercial buildings like Google’s California headquarters.
Setting Up Solar Panels
Solar panels absorb sunlight as clean energy, and convert it into electricity that can be utilized to power electrical devices. Solar panels comprise of individual solar cells composed consisting of layers made of silicon (which creates the negative charge) and phosphorus (which emits positively charged). Photons are taken up by solar panels which in turn create the electric charge. The photons that hit the solar panel’s surface release energy that permits electrons to escape their orbits around the atoms. The energy is released to create an electric field the solar cells, which draws these electrons into an electric current in the direction of. The Photovoltaic Effect is the name of the entire process. A typical home has enough space on the roof to support enough solar panels to generate enough power to meet every need.
A solar array can generate electricity during the day, if you connect it to the grid. The energy generated can be used at night. Solar generator owners may be money through net metering programs when their system produces more power than what is utilized at home. The battery controller, a charge bank inverter and charger are required components for off-grid solar systems. The charge controller is responsible for sending Direct Current (DC) power directly to solar panels. The battery bank then draws power through the inverter. The inverter transforms DC energy into AC which can be used to power other appliances that are not DC. The solar arrays are increased to meet the most stringent electrical load requirements with an inverter. AC currents provide power to commercial and residential buildings, boats and recreational vehicles, remote cabins and cottages, homes remote traffic control, telecom equipment, and monitoring of gas and oil flow.
Benefits of Solar Panel system
- Solar panels are an effective and efficient method of generating electricity for many reasons. Off-grid living is the most obvious. Living off grid means that you reside in a region that isn’t linked to the main electric utility grid. Systems that use solar energy are perfect for cabins and homes that are located in remote areas. There is no need to pay high costs for the installation of utility poles or cabling to the closest main grid access point. If it is properly maintained, a solar electric system will be less expensive and supply the amount of power for up to three decades.
- In addition to the fact that solar panels can be used for powering your house, the most appealing feature of solar panel installation is the fact that they are completely renewable and clean. It’s becoming more imperative to do all possible to decrease the atmospheric pressure from carbon dioxide emissions. Solar panels don’t have moving parts so they require minimal maintenance. Solar panels are constructed to be durable and can last decades when properly maintained.
- The final, and certainly not the least, benefit that solar panels offer is the fact that, once the initial installation cost has been paid, all the electricity produced for the rest of the life of the system that could last from to 15 years, dependent on how efficient the system is, is completely free. Grid-tie solar power system owners reap the benefits from the moment their system comes operational. This could eliminate monthly electric bills, or generate additional revenue from the electric companies.
Solar panels are able to generate electricity in a variety of other ways. There are too many benefits to mention. You’ll discover a lot about the convenience and versatility of solar power by looking through our site.
Guide to setting up a solar power unit.
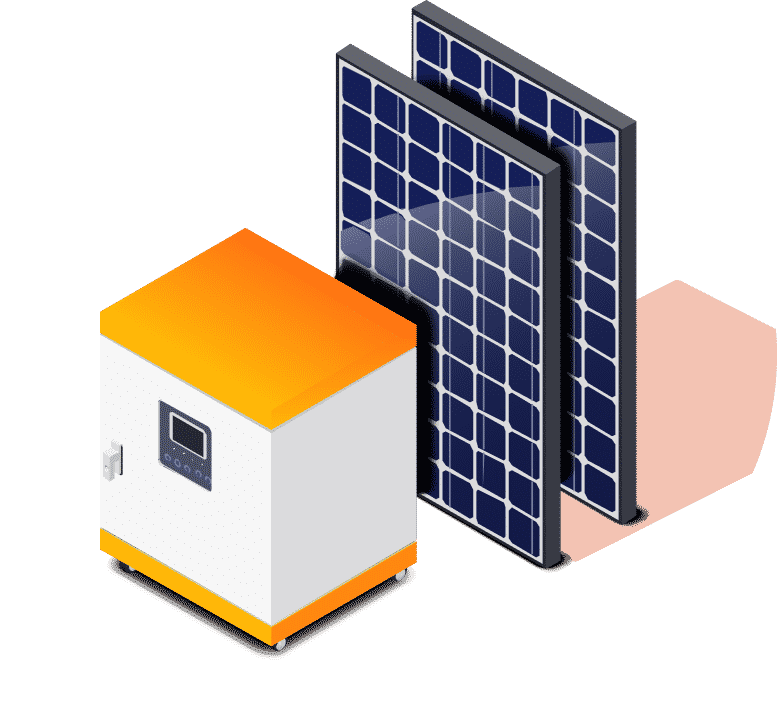
Step 1: Gather the essential components needed for solar power.
It is the first thing to do to gather the basic components of the solar-powered system. There are four primary components you will need for your solar system: a solar panel charge controller and inverter. Additionally, you’ll need a breaker and meter, MC4 connector, as well as fuses. It is important to carefully follow the directions for your solar panel module.
Step 2: Calculate the power load
It is essential to determine the power consumption you use at home prior to beginning your solar system installation. It’s not difficult. You just need to take off all the appliances that you use on a daily basis including lights, fans, televisions, and lighting. Then, you can calculate the average time these appliances are in operation each day. To determine the power ratings and usage duration of your household electric appliances, refer to their specifications chart.
Calculate the Watt-Hour using the runtime of the appliance and the power rating. The process is the same for every appliance. Then, add the individual watt-hour numbers and you’ll have the total. A calculator online which calculates off-grid loads could simplify the process.
Step 3. Charge the battery
One major issue that solar power faces is the inability to generate electricity after the sun sets. This issue can be solved by using a lithium-ion or lead-acid battery. A battery, whether it’s lead-acid or lithium-ion can store sunlight throughout the day, and discharges it at night. If you choose the best battery capacity, it will ensure a constant supply. To monitor the charge of your battery, you’ll require a power control unit. These are found between the panels of the battery. The controllers usually have an LED light that indicates the status of charging the battery and regulates the flow of power to it.
Step 4: Install the inverter
While solar arrays generate electricity in direct current electrical appliances require power in the form of alternating current (AC). An inverter is a gadget which allows you to utilize electric appliances without the need for adaptors. There are many types of inverters available, including modified sine-wave and square wave inverters. Modified sine waves can be used in conjunction with certain appliances. However, square wave inverters will not work with all gadgets. A sine wave convertor that is pure is the ideal choice for solar systems.
Step 5: Attach the solar panels on your roof
Once the controller and battery are in place, you can mount the solar panels. The most suitable place to put the panels is to put them on the roof, or anyplace where you can receive sun’s energy. Either make your own mount stand or purchase it from the market. The mounting stands need to be tilted to approximately equal the angle of latitude at the location you are located. Setting the solar panel correctly is vital for their functioning and maintenance. It is important to ensure the solar panels face the sun all day.
Wire the solar panel in the final phase. A tiny junction box can be traced to the rear on the solar panel. You can see the junction box’s negative and positive indicators of polarity. The junction box may be equipped with terminal wires that have an MC4 connector if it is large. If you’ve got a smaller solar panel, the junction box will need to be aligned to external wires. The black and red wires are used for the negative and positive terminal connections.
Step 6 Join solar panel to battery
The solar panels must connect with the battery. They are joined in certain PV systems, to ensure that you don’t have to perform any additional work. If you are given several units, it’s important that they be joined in parallel and series. The series connections are made through connecting the terminals of a device to another device’s terminal. To create a parallel connection make sure that you connect one device’s positive terminal to another device, and so on.
Step 7: Setup is for the inverter/battery.
Without stands for the inverter as well as the battery, your solar home system isn’t complete. There are two options to choose from: make the stands yourself, or buy the stands. After you have the positions for the inverter and battery installed, you are able to start wiring. First, connect the controller. The controller is connected to the solar panels through this connection. A second connector connects the controller to the battery. The final connection connects controller and the DC load connection.
An MC4 connector is required for connecting the solar panel and charging controller. After the controller is linked to the battery the controller’s LED lights will light up. The inverter terminal needs to connect to the terminal of the battery.
5 Steps for Solar Panel Installation
You can reduce the dependence of traditional service providers by introducing an at-home solar powered energy framework for solar power. This can help you balance the largest part (or the total) of your energy bill each month. It will also help you reduce your impact on the environment and develop cleaner, more energy efficiency networks.
It is quite absurd to say that most of the elements that define the success of a sun-powered business are not directly related to the specific establishment. Before we go into the specifics of how to set up sun-powered chargers, here are some tips.
In order to introduce solar-powered chargers you have to have a solid understanding of the sun-driven development, planning and design. For the average consumer, it is best to avoid installing a solar power charger setup at home, and instead work with the skilled local installers of Texas Solar Group. A properly planned PV framework will offer more reserves than DIY solar facilities and will save you cash in the long run.
It is important to remember that the process of setting up a solar power charger won’t happen in a flash. Even if you have the best sunlight-powered chargers, there are still crucial steps that must be completed to ensure a reliable, efficient, and environmentally-friendly power system.
These are the steps to install a Solar System.
1) Conduct a Site Survey with our Engineer
After you have chosen and signed a contract to Texas Solar Group, the best residential solar installer, our engineer will visit your home to assess the electrical system in your home and verify that it is compatible with your 60W solar panel design. Our engineer may either be an independent or employee.
It is possible that the engineer will advise you to replace or upgrade your current electrical system if not in good condition. This indicates that your new solar panel will need more energy than the current system.
An engineer with Texas Solar Group will inspect the roof of your home and verify your electrical system. Our engineer will also need to ensure that the roof is able to support the weight and structural strength of the solar panels. Local installers will tell you whether you require a special mounting system like a flat roof.
Solar systems will only work in the way they were created. This is the reason it is crucial to choose a trustworthy solar engineer from Texas Solar Group.
2) Get the right permits
There are certain administrative hurdles to be overcome before setting up solar panel installations. It is necessary to obtain all permits and documents to ensure that your solar panel installation meets all local safety standards. It’s difficult to imagine how many problems can be caused by an installation that is not permitted.
While this may seem daunting, there are many steps to be taken when installing solar panels. The majority of the paperwork is managed by our company. Although you don’t need to sign anything, it’s crucial to know what’s happening behind in the background.
Here are the documents your solar installer will file:
- You can get local permit for construction and electrical work for your area
- Interconnection agreement with your local utility. This basically gives permission to your utility for solar installation and for enrollment in net metering.
- Applications for federal and state incentive programs to reduce costs of installing solar panels.
- You could qualify to receive tax credits, rebates or financial assistance to offset the installation cost by completing this form.
Your solar installer will need to wait a while to complete all forms. It can also take a few days for your government review all the information. To make sure that the process is running well, it’s an excellent suggestion to communicate with your solar provider and receive regular updates. The squeaky wheels get some grease but the solar businesses are typically full of business.
3) Buy the Right Equipment
Once you’ve completed all the paperwork and permits After you have completed all paperwork and permits, your Texas Solar Group solar installer can place an order for your solar equipment.
You have now selected the kind and quantity of solar panels you require and the best inverters and solar cells that will fit your home. The options are usually included in the solar proposal which is sent to you before you sign the contract.
It is important to research the different choices and the way solar panels function. Your solar installer from Texas Solar Group will be in a position to assist you in selecting the right equipment for you regardless of whether you are looking at the best efficiency, or the most affordable solar panel.
The name you provide will be used as a reference to our installer following the time you’ve ordered your solar equipment. This means that your solar panels are erected by our installer when his arrival at the distributor.
4) Install Your Solar Panels
The big day has arrived. Your Texas Solar Group installer will arrive and prepare your roof. This includes ensuring that the shingles and tiles have been securely attached. Our installer will then install the wiring needed to connect the residential solar panel to the electrical grid.
Our installer will attach the brackets to hold the solar panels position after connecting the wires. The panels are then put on the rack. Our installer will also install the battery power pack, in the event that you already have one.
The most commonly asked query about installing solar panels concerns the length of time it takes. It will depend on how big your house is as well as how long the solar panel installation will be but it will be between one and three days.
This is a simple process if your solar system was correctly designed and planned.
5) Get your system approved.
Texas Solar Group installer will “flip the switch” and then turn on the system after it has been installed. Before you can turn on the solar system there is a representative from the city may be required to examine and accept it. This is known as a permit-to operate (PTO). This is simply a safety precaution to ensure that there are eyes on the ground to inspect the wiring.
To connect your system to the grid, you will need to have an agent for your provider. This allows you to draw power when needed and then return excess energy to your grid. Credit can be obtained through your utility provider via net metering.
GET YOUR FREE PROPOSAL IN A FEW EASY STEPS
Fill out the form and our sales consultant will contact you! Once you’ve had your initial consultation, you’ll begin your solar journey.